
Everything You Need to Know About Emergency Tarp Services
Why an Emergency Roof Tarp is Critical After Storm Damage
If you need an emergency roof tarp installed right away, here is what to know upfront:
Quick Answer: Emergency Roof Tarping
| Question | Answer |
|---|---|
| What is it? | A heavy-duty waterproof cover installed over damaged roof sections to stop water intrusion |
| When do you need it? | After storm damage, fallen trees, missing shingles, or any roof breach |
| How fast should you act? | Within 24-48 hours — mold can begin growing in as little as 24 hours |
| Who should install it? | A licensed roofing contractor for most situations; DIY only for small, low-pitch damage |
| Does insurance cover it? | Yes — most homeowners policies cover tarping as required storm damage mitigation |
| Average cost? | $500–$2,000, or roughly $1.00–$2.80 per square foot |
A storm just hit Wesley Chapel. You’ve got a hole in your roof, water is coming in, and permanent repairs are days — or weeks — away. What happens between now and then matters enormously.
Water that enters through a damaged roof doesn’t stay in one place. It travels along rafters, soaks into insulation, and can begin triggering mold growth within 24 hours in Florida’s humid climate. Secondary water damage accounts for up to 80% of total storm-related repair costs — meaning the damage after the initial storm often costs far more than the storm itself.
An emergency roof tarp is the first and most critical line of defense. It’s a temporary waterproof barrier that seals a breached roof until storm damaged roofing professionals can complete permanent repairs. And beyond protecting your home, it protects your insurance claim — most policies require homeowners to take reasonable steps to prevent further damage, or risk having claims partially or fully denied.
I’m Tyler Wood, owner of Thunder Bay Roofing, the leading Wesley Chapel roofing experts providing rapid storm response across West Central Florida — a veteran-owned company built specifically to handle the roofing challenges Florida weather creates, including emergency roof tarp installation after hurricanes, high winds, and severe storms. According to the National Roofing Contractors Association (NRCA), immediate mitigation is the most effective way to prevent long-term structural decay. In this guide, I’ll walk you through everything you need to know to protect your home fast and make the right call.
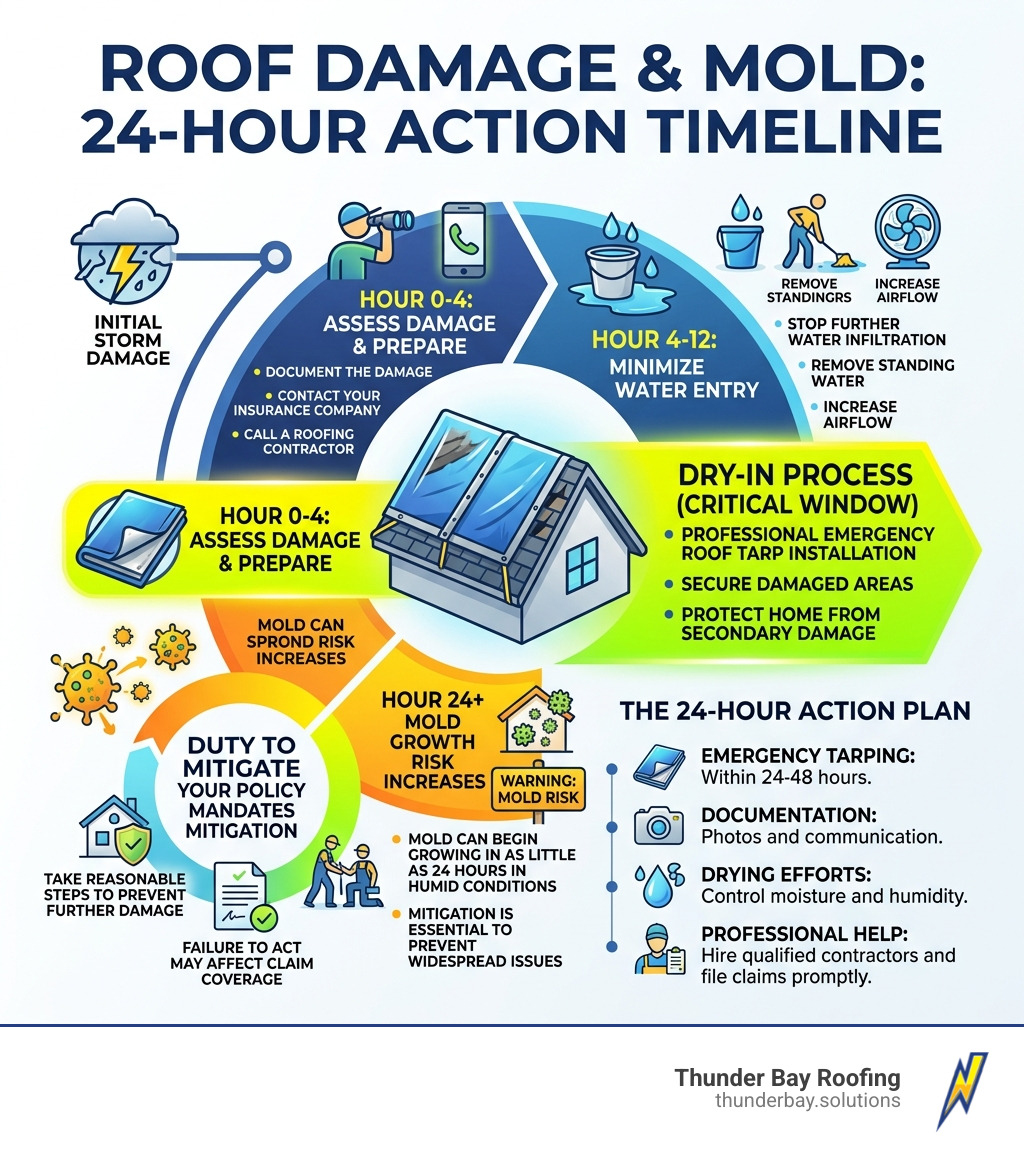

When a storm compromises your roof, the clock starts ticking immediately. In May 2026, we are seeing increasingly intense weather patterns across West Central Florida, making the “dry-in” process more vital than ever. An emergency roof tarp serves as a temporary shield, buying you the time necessary to coordinate with adjusters and contractors without the fear of every afternoon thunderstorm ruining your living room.
Beyond simply stopping a leak, tarping is about preserving the structural integrity of your home. When water enters through a breach, it begins to rot wooden rafters and saturate drywall. According to industry data, wooden rafters can lose 20–30% of their load-bearing capacity within just weeks of ongoing moisture exposure. If you’ve experienced a wind damage repair emergency, getting a tarp on the roof is the single most effective way to halt this degradation.
Furthermore, tarping is often a legal and contractual necessity. For more detailed insights on the regional necessity of these repairs, you can review the Emergency Roof Tarping and Temporary Repairs Guide.
Preventing Secondary Water Damage with an Emergency Roof Tarp
The primary goal of emergency tarping is to prevent secondary damage. This refers to the destruction that happens after the initial event. For example, if a tree limb punctures your roof, that is primary damage. The mold that grows in your walls three days later because rain kept entering that hole is secondary damage.
One of the most hidden victims of water intrusion is your attic insulation. Statistics show that wet insulation can lose up to 50% of its R-value immediately upon saturation. This doesn’t just make your home uncomfortable; it sends your energy bills skyrocketing. By sealing the breach quickly, you keep the moisture out of your insulation and away from your electrical systems, preventing potential fire hazards and expensive rewiring.
How an Emergency Roof Tarp Protects Your Insurance Claim
Many homeowners are surprised to learn that their insurance policy likely contains a “duty to mitigate” clause. This means the policyholder is responsible for taking “reasonable steps” to prevent further damage after a loss occurs. If you leave a hole in your roof for a week without a tarp and a second storm causes $20,000 in interior water damage, your insurance company may deny the claim for that secondary damage.
In fact, approximately 15–20% of insurance claims are rejected due to non-compliance with these mitigation requirements. To protect your claim, we recommend:
- Documenting the damage with timestamped photos before the tarp goes up.
- Keeping all receipts for tarping materials or professional invoices.
- Notifying your insurer within 24–72 hours of the event.
For homeowners dealing with severe weather, our hurricane damage roof repair page offers specific advice on navigating these complex Florida claims.
Step-by-Step Guide to Installing an Emergency Roof Tarp Safely
If you must attempt a DIY installation on a low-slope roof, following a professional workflow is essential to ensure the tarp doesn’t blow away during the next gust of wind. A poorly installed tarp has a 40% failure rate in high winds, compared to only 15% for professional installations.
- Assess and Clear Debris: From the ground, use binoculars to identify the damage. Once it is safe to climb, remove loose shingles, branches, and debris from the area so the tarp can lay flat.
- Measure for Overlap: Never use a tarp that just barely covers the hole. Your emergency roof tarp should extend at least 4 feet beyond the damaged area on all sides. If the damage is near the peak, the tarp must wrap over the ridge by at least 3 feet to prevent water from running underneath the top edge.
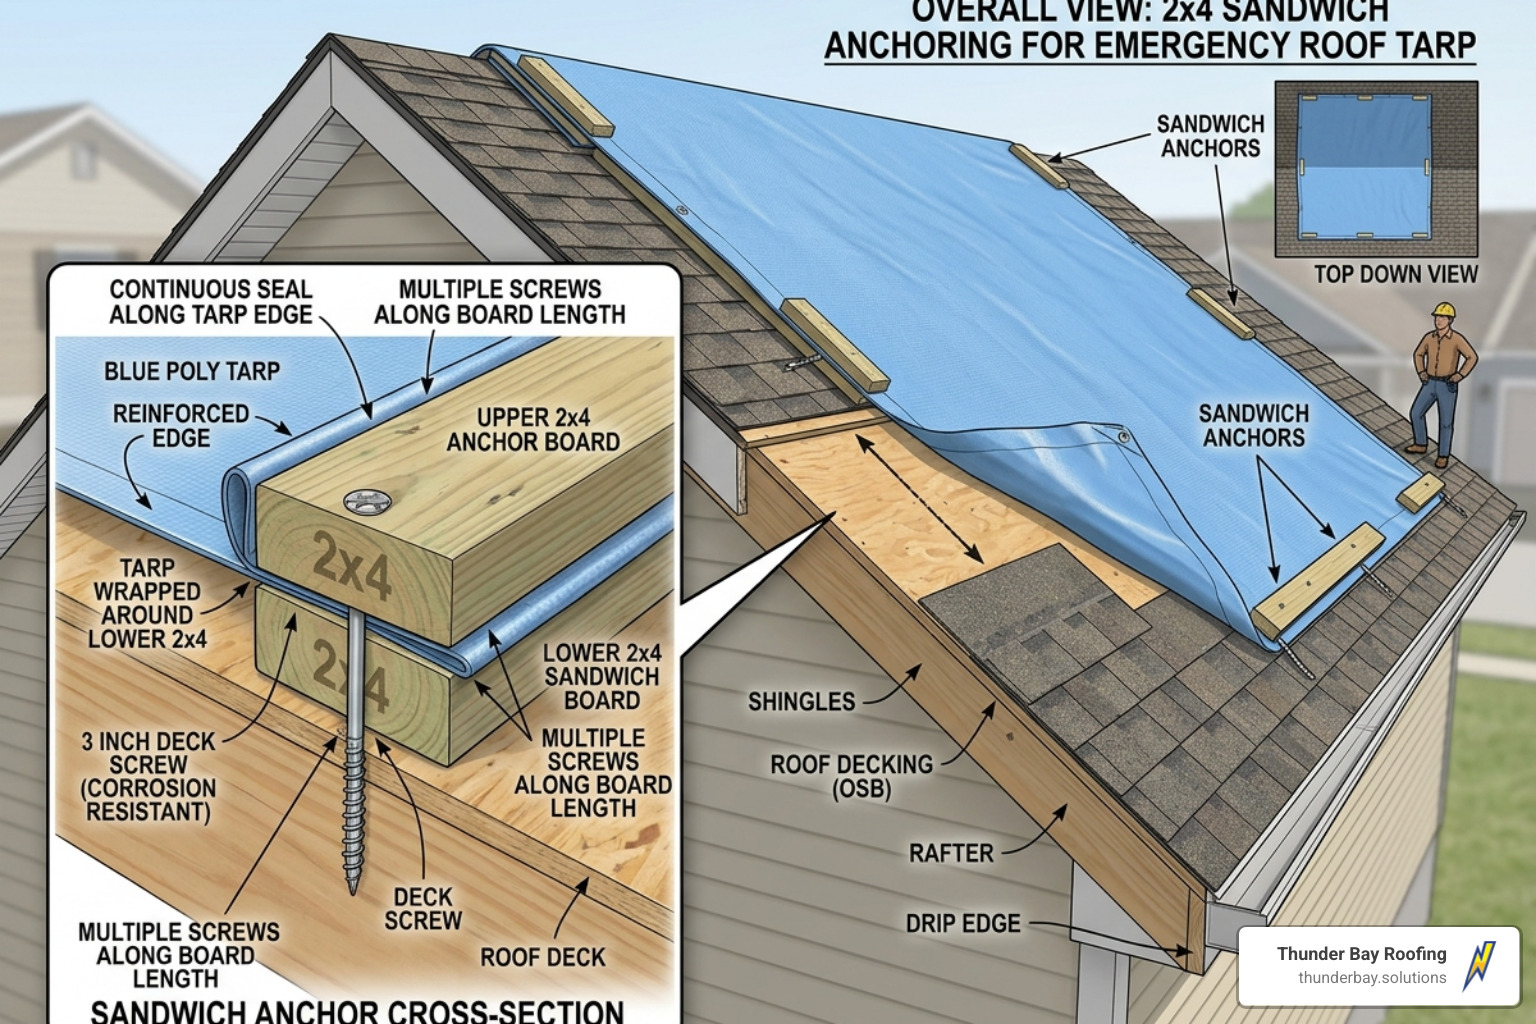
- The “2×4 Sandwich” Method: This is the professional standard for anchoring. Instead of just nailing through the grommets (which will tear), wrap the edge of the tarp around a 2×4 board. Screw through the board and the tarp into the roof deck.
- Peak-to-Eave Installation: Always start at the highest point and work down. This ensures that water flows over the overlaps like shingles, rather than catching an edge and flowing under the tarp.
- Tensioning: Pull the tarp taut to prevent water pooling. Standing water on a tarp will eventually lead to a collapse or a slow seep.
For more information on professional standards in different regions, see Emergency Roof Tarping Rochester, NY. If the damage is extensive, you may need a full roof repair rather than just a patch.
Essential Materials for a Professional-Grade Seal
Don’t reach for a thin blue camping tarp from a big-box store. Those are usually only 3–5 mils thick and will degrade under the Florida sun in days. For a reliable seal, you need:
- Heavy-Duty Tarp: Minimum 10-mil polyethylene or vinyl. Professional-grade tarps are UV-stabilized and often fire-retardant.
- Lumber: 2×4 or 1×4 furring strips to create anchor points.
- Fasteners: 2.5 to 3-inch deck screws or cap nails. Screws are preferred because they hold better against wind uplift and are easier for a roofer to remove later.
- Safety Gear: A high-quality ladder, non-slip shoes, and ideally, a fall-arrest harness.
Safety Protocols and Fall Prevention
Safety cannot be overstated. Falls are responsible for 25% of all roofing injuries. Before you even think about stepping onto a ladder, consider the following OSHA fall protection standards:
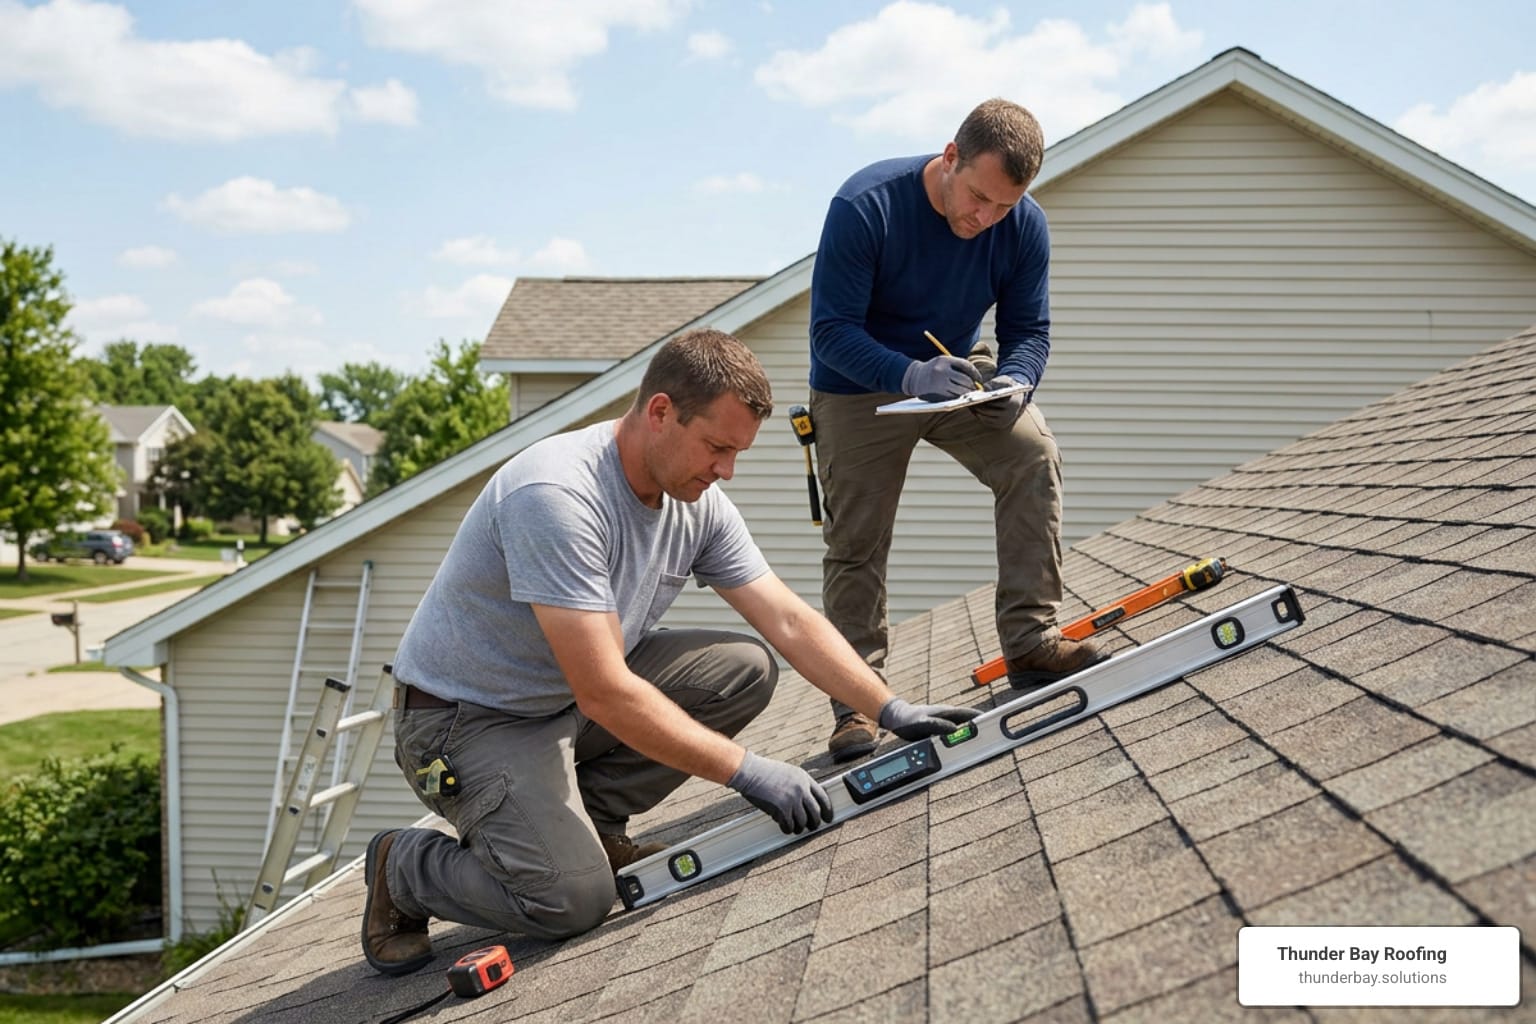
- The 6:12 Rule: If your roof pitch is steeper than 6:12 (meaning it rises 6 inches for every 12 inches of horizontal length), it is considered “non-walkable” for amateurs. Do not attempt a DIY tarp job on a steep roof.
- Weather Conditions: Never go on a roof during active rain, lightning, or winds exceeding 20 mph.
- Power Lines: Check for overhead lines before moving your ladder.
- Structural Integrity: If a tree has fallen on the house, the rafters may be compromised. Do not walk on a roof that may collapse.
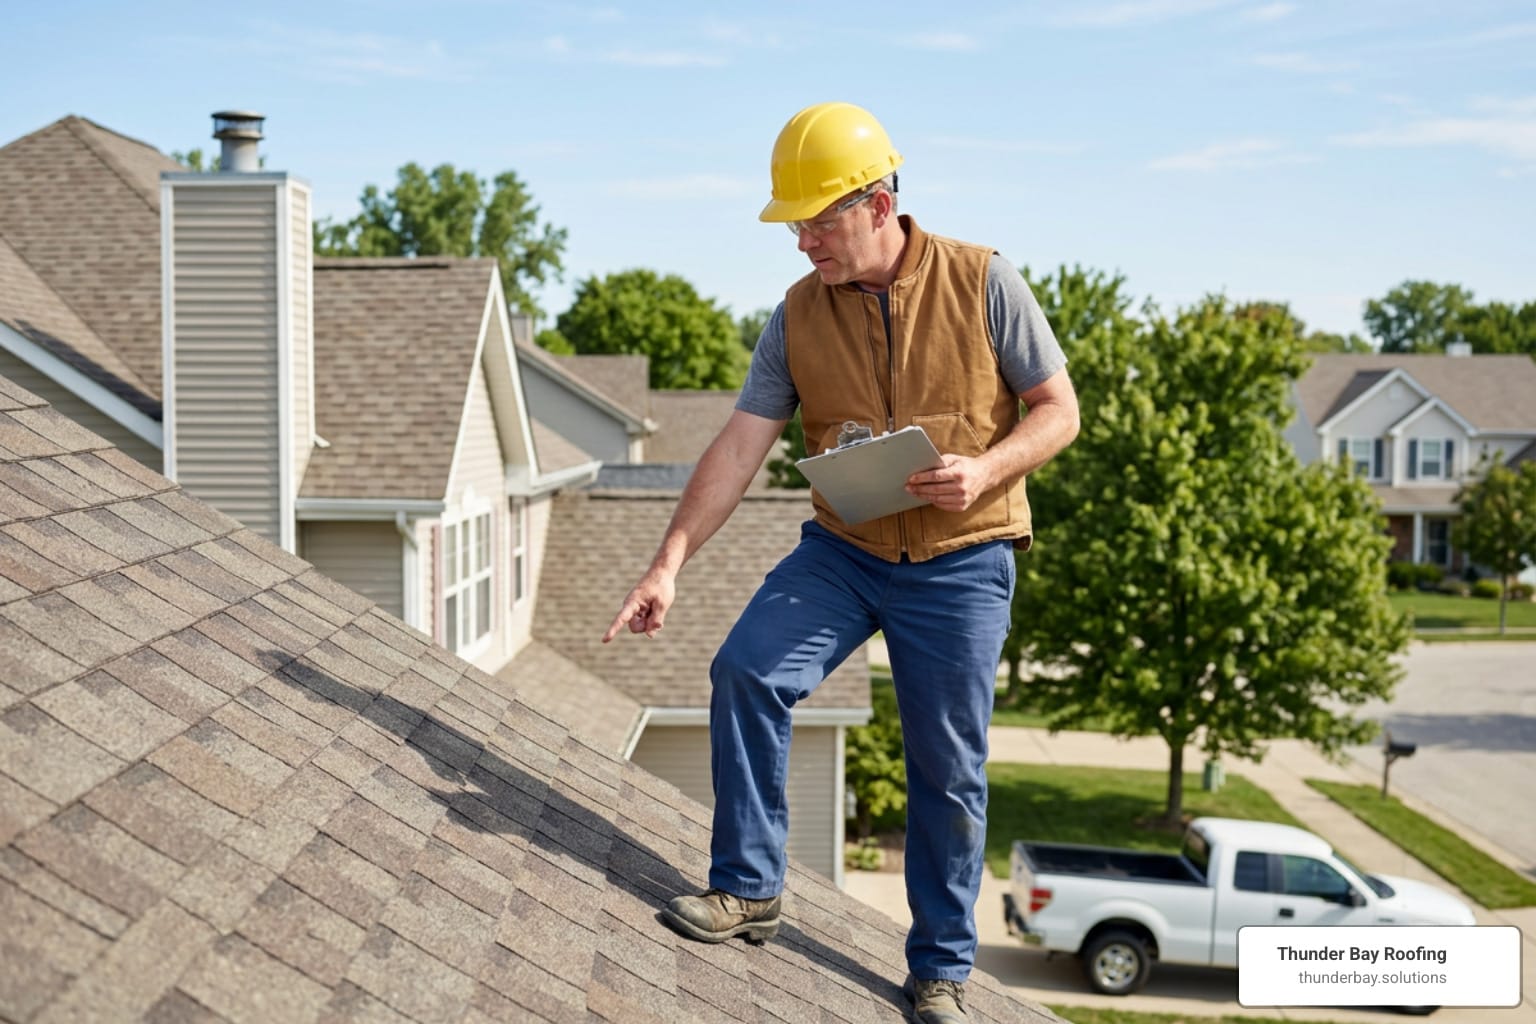
If you aren’t sure about the state of your roof, it’s always safer to schedule roof inspections with a qualified professional.
Professional vs. DIY: When to Call for Emergency Tarping Services
Deciding whether to climb up yourself or call a specialist often comes down to the complexity of the damage and your comfort with heights.
| Feature | DIY Tarping | Professional Tarping |
|---|---|---|
| Average Cost | $50 – $200 (Materials) | $500 – $2,000 |
| Failure Rate | 40% in high winds | 15% in high winds |
| Lifespan | 30 – 60 Days | 90 Days – 18 Months |
| Safety Risk | High (Fall risk) | Low (OSHA Compliant) |
| Insurance Ease | Low (Needs documentation) | High (Direct coordination) |
While DIY is tempting for small areas of residential roofing, most homeowners find that the peace of mind offered by a professional is worth the investment.
The Risks of Improper Tarp Installation
A bad tarp job is sometimes worse than no tarp at all. If a tarp is loose, it will “billow” in the wind. This creates a vacuum effect that can actually pull up more shingles, expanding the damage. Furthermore, if you nail through undamaged shingles to secure a tarp, you are creating dozens of new leak points that weren’t there before.
In commercial roofing, improper tarping can lead to massive liability issues, especially if water leaks into expensive inventory or electronics.
Benefits of Hiring a Licensed Specialist
When you hire a specialist for an emergency roof tarp in Lutz or Land O’ Lakes, you aren’t just paying for a piece of plastic. You are paying for:
- Rapid Response: Most emergency services can be on-site within 2 to 6 hours.
- Specialized Equipment: Professionals use infrared cameras to detect hidden moisture patterns that the naked eye can’t see.
- Durability: Professional-grade PVC or reinforced tarps can withstand hundreds of hours of UV exposure, whereas consumer tarps often “cook” and become brittle within weeks.
- Insurance Coordination: Many contractors, including our team, provide the specific photo documentation and moisture readings that adjusters look for.
For business owners, our commercial roof repairs team understands the urgency of keeping your doors open while maintaining a dry interior.
Navigating Insurance Claims and Tarping Costs
Understanding the financial side of emergency repairs helps reduce stress during a disaster. Because water damage is the second most common home insurance claim in the U.S. (accounting for 1 in 4 claims), insurers and manufacturers like Owens Corning have very specific protocols for how they handle tarping costs and mitigation.
Understanding the Cost Factors of Emergency Services
The cost of an emergency roof tarp isn’t a flat fee. Several factors influence the final invoice:
- Roof Size and Damage Area: Most pros charge between $1.00 and $2.80 per square foot for the tarped area.
- Roof Pitch: Steep slopes (over 8/12) often incur a 25-50% surcharge due to the need for specialized safety rigging.
- Height: Multi-story homes require longer ladders and more labor.
- Emergency Premiums: After-hours or holiday service typically costs about 30% more than standard scheduling.
- Material Quality: A 15-mil thick tarp will cost significantly more than a standard 6-mil version but offers much better protection.
If the damage is so severe that a patch won’t work, you may be looking at a full roof replacement, which your insurance should also cover if caused by a covered peril.
Documentation Needed for Full Reimbursement
To ensure your insurance company pays you back for the tarping, you must be meticulous.
- The “Before” Shots: Take wide-angle and close-up photos of the damage before it is covered.
- The “After” Shots: Show the completed tarping, highlighting the anchoring methods used.
- Detailed Invoices: Ensure the contractor’s invoice specifies the materials used, the square footage covered, and the labor hours.
- Moisture Reports: If the contractor used a moisture meter, include those readings to prove the extent of the initial leak.
If you have questions about starting this process, please contact us today. We can help you document the damage properly from the start.
Frequently Asked Questions about Emergency Roof Tarping
How long can a temporary roof tarp safely remain installed?
A standard heavy-duty tarp is designed to last between 30 and 90 days. After this window, UV rays from the Florida sun will begin to break down the polyethylene, making it brittle and prone to tearing. Industry leaders like GAF recommend inspecting temporary repairs weekly until permanent solutions are implemented. However, professional-grade, FEMA-compliant tarps can last 12 to 18 months if they are UV-stabilized and installed with high-strength anchors. Regardless of the material, a tarp is a “dry-in” solution, not a permanent fix.
Does homeowners insurance cover the cost of emergency tarping?
Yes, in almost all cases where the damage was caused by a covered peril (like wind, hail, or a fallen tree). Because tarping is considered a “reasonable step” to mitigate further loss, insurance companies are usually happy to reimburse the cost. It is much cheaper for them to pay $1,000 for a tarp than $50,000 for a mold remediation and interior gut-job. Your standard deductible will usually apply to the overall claim.
What is the average cost for emergency roof tarping in 2026?
In 2026, professional emergency tarping jobs typically fall between $500 and $2,000. For a standard 2,000-square-foot roof with moderate damage, you can expect to pay around $1.00 to $1.50 per square foot for standard labor, or up to $2.80 per square foot for emergency, after-hours response. DIY material kits (tarp, boards, and screws) usually cost between $50 and $200.
Conclusion
When the skies clear after a Florida storm, the real work begins. An emergency roof tarp is more than just a piece of plastic; it is a critical investment in your home’s future and your financial security. By acting within that first 24-48 hour window, you stop mold in its tracks, protect your belongings, and satisfy your insurance requirements.
At Thunder Bay Roofing, we specialize in the unique demands of West Central Florida weather. Whether you are in Wesley Chapel, Land O’ Lakes, or Lutz, our team is ready to provide fast, professional tarping services that stand up to high winds and heavy rain. We are veteran-owned, licensed, and insured, bringing a level of discipline and expertise to every roof we protect.
Don’t wait for the next storm to turn a small leak into a major disaster. If your roof has been compromised, visit our website to get a free roof quote. We’ll get your home dried in so you can breathe easy.