Corrugated Metal Roofing Installation: From Gutter to Peak
Planning and Cost Factors for Corrugated Metal Roofing Installation
Corrugated metal roofing installation is one of the most cost-effective ways to protect a home or commercial building for decades — but only when it’s done right. At Thunder Bay Roofing, we provide expert roofing services that ensure your investment stands up to the harsh Florida climate. We see the full range of results: roofs that last 50+ years and roofs that leak after the first Florida rainstorm because one early step went wrong.
Here’s a quick overview of how corrugated metal roofing installation works:
- Plan and measure — Calculate panel quantities, choose your gauge and material, and confirm your roof pitch meets the 3:12 minimum
- Prepare the substrate — Inspect decking, install synthetic underlayment, and add eave trim (drip edge)
- Square the roof — Use the 3-4-5 triangle method to establish a straight starting line
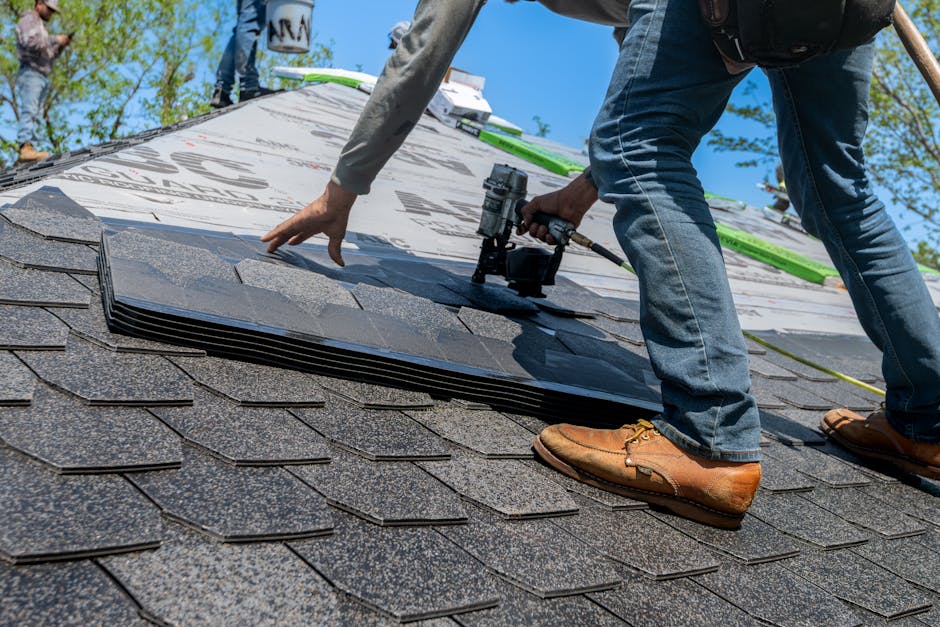
- Install panels — Start from the windward side, overlap by one full corrugation, and fasten through the high points
- Seal and weatherproof — Apply butyl tape at end laps and foam closure strips at eaves
- Install trim and flashing — Fit gable trim, valley flashing, and eave trim in sequence
- Cap the ridge — Install closure strips, then the ridge cap with a minimum 6-inch overlap
- Final inspection — Check every fastener, clear all metal shavings, and inspect all seams
Done correctly, corrugated metal roofing delivers an average 85.9% return on investment and a lifespan of 30 to 70 years according to data from the Metal Roofing Alliance.
I’m Tyler Wood, owner of Thunder Bay Roofing in Wesley Chapel, Florida — a company I built specifically to handle the demands of Florida weather, including the UV exposure, heavy rain, and hurricane-force winds that put every corrugated metal roofing installation to the test. In this guide, I’ll walk you through every step of the process so you know exactly what a proper install looks like — and what to watch out for.

Before you drive the first screw, you need a solid plan. In April 2026, the market for metal roofing continues to grow because homeowners recognize the long-term value. However, your total investment depends heavily on the materials you select. On average, you can expect to pay between $5 and $12 per square foot installed for a corrugated metal roof.
While a roof replacement is a significant undertaking, corrugated panels are often more budget-friendly than standing seam systems. Here is how the most common materials compare:
| Material | Cost per Sq. Ft. (Installed) | Lifespan | Best Use Case |
|---|---|---|---|
| Galvanized Steel | $5 – $8 | 30-50 Years | Budget-friendly residential/sheds |
| Aluminum | $7 – $13 | 50+ Years | Coastal areas (Lutz, FL) |
| Copper | $13 – $30 | 100+ Years | High-end architectural accents |
For a deeper dive into current pricing trends, check out this 2025 Corrugated Metal Roof Cost, Pros & Cons, Buying Guide.
Material Selection and Gauges
In metal, a lower gauge number means a thicker panel. For residential roofing services in West Central Florida, we typically recommend 24-gauge or 26-gauge panels. While 29-gauge is available and cheaper, it is much more prone to oil canning (visible waviness) and damage from Florida’s frequent hail or falling branches.
You also have a choice between Galvalume (an aluminum-zinc alloy) and Galvanized (pure zinc coating) steel. Galvalume generally offers superior corrosion resistance, making it the standard for our Florida climate. If you live right on the coast, aluminum is your best friend because it simply doesn’t rust.
Calculating Panels and Fasteners
Precision in ordering prevents mid-project delays. Most 7/8″ corrugated panels have a 32-inch coverage width. This means that even though the sheet is wider, you only “gain” 32 inches of roof per panel once they are overlapped.
- Panels: Divide your roof width by the coverage width (e.g., 32″) and add a 10% waste factor for cuts and mistakes.
- Fasteners: A good rule of thumb is 20 screws per panel (for a standard 10-12 foot sheet). For those looking for a free roof quote, we can provide a detailed breakdown of exactly what your specific roof geometry requires.
Substrate Preparation and Squaring Techniques
The secret to a leak-free metal roof isn’t actually the metal—it’s what is underneath it. If your roof deck is wavy or out of square, your metal panels will telegraph those imperfections, leading to “funhouse mirror” distortions and gaps in your overlaps.

Before beginning the corrugated metal roofing installation, a thorough decking inspection is mandatory. We look for soft spots, rot, or protruding nails. If the substrate isn’t solid, the fasteners won’t hold during a hurricane. Furthermore, corrugated metal with exposed fasteners requires a minimum pitch of 3:12. Anything lower requires special sealants and structural considerations. For more technical details on slope, see this Step-by-Step Guide to Installing Corrugated Metal Roofing.
Preparing the Substrate for Corrugated Metal Roofing Installation
Once the deck is clean, we apply the underlayment. While traditional felt paper was the old standard, we now exclusively use synthetic underlayment or peel-and-stick barriers. These materials are more durable, don’t tear in high winds, and provide a secondary water barrier that is essential for roof repair prevention.
We also install the eave trim (drip edge) at this stage. It should have a slight overhang (about 1/2 inch) to direct water into the gutters and away from the fascia boards.
Squaring the Roof Deck
You cannot simply “eyeball” the first panel. If you are off by even 1/8 of an inch at the eave, you could be off by 2 inches or more by the time you reach the ridge. We use the 3-4-5 triangle method:
- Measure 3 feet along the eave from the corner.
- Measure 4 feet up the rake.
- The distance between those two points must be exactly 5 feet.
If it isn’t, we adjust our starting chalk line to ensure the panels run perfectly straight. This level of precision is why our commercial roofing services are trusted for large-scale warehouses where alignment is even more critical.
Step-by-Step Panel Placement and Overlap Rules
Now for the main event: laying the panels. We always start on the windward side of the roof (the side the wind usually hits first). In Wesley Chapel and Land O’ Lakes, this is typically the Southwest. Starting here ensures that the panel overlaps “face” away from the wind, preventing rain from being blown under the seams.

Overlap Rules:
- Side Laps: Overlap by at least one full corrugation. For low-slope roofs, we often overlap by two.
- End Laps: If your roof is long enough to require two panels stacked vertically, the top panel must overlap the bottom panel by at least 6 inches. This lap must occur over a purlin or solid support.
For a homeowner’s perspective on these details, you might find this Practical Guide for Homeowners helpful.
Fastening Techniques for Corrugated Metal Roofing Installation
This is where most DIYers—and even some pros—get it wrong. For corrugated metal roofing installation, screws should almost always be driven through the high point (peak) of the corrugation, not the valley.
Why? The valley is where the water flows. Putting a hole there is asking for a leak. By fastening through the peak, you keep the penetration out of the “river.” We use screws with neoprene or EPDM washers.
The “Goldilocks” Torque:
- Too loose: The washer won’t seal, and the panel will rattle.
- Too tight: The washer will crush and mushroom out, which actually causes the rubber to crack and leak within a few years.
- Just right: The washer should be compressed firmly but still visible and circular.
Our metal roofing experts use drills with adjustable clutches to ensure every single screw is set to the exact same torque.
Sealing and Weatherproofing
In Florida, “water-resistant” isn’t good enough; it has to be watertight. We apply butyl tape to every end lap (where panels overlap vertically). Unlike standard caulk, butyl tape remains flexible for decades, allowing the metal to expand and contract in the heat without breaking the seal.
We also install foam closure strips at the eaves and the ridge. These are shaped exactly like the “waves” of the metal. They block out wind-driven rain, pests, and debris while still allowing the roof to breathe. This is a critical part of storm damage restoration—ensuring the roof is sealed against the next big one.
Installing Trim, Flashing, and Finishing Details
The panels are the “skin,” but the trim is the “skeleton” that holds the weatherproofing together. We install trim in a specific sequence: eave trim first, then valley flashing, then panels, then gable (rake) trim, and finally the ridge cap.
Valleys are particularly high-risk areas. We use “W-style” valley flashing which has a center diverter to prevent water from rushing from one side of the roof and pushing up under the panels on the opposite side. If you’re curious about the specific parts, The Home Depot’s guide has some great visual breakdowns of trim types.
Ridge Caps and Ventilation
The ridge cap is the crown of your roof. For our Lutz roofing services, we highly recommend vented ridge systems. Metal roofs can get incredibly hot; a vented ridge allows that trapped heat to escape the attic, lowering your cooling bills.
- Overlap ridge cap sections by at least 6 inches.
- Always lap the downwind section over the upwind section.
- Use closure strips to prevent birds and bees from making your attic their new home.
Handling Roof Penetrations
Chimneys, plumbing vents, and skylights are the most common leak points. We use pipe boots made of EPDM or silicone that slide over the pipe and have a flexible metal base that we mold to the corrugated profile. For larger penetrations like chimneys, we use custom-fabricated counter-flashing. Proper flashing is the difference between a minor repair and needing a hurricane damage repair specialist after a tropical storm.
Frequently Asked Questions about Corrugated Metal Roofing
What is the minimum roof pitch for corrugated metal?
The industry standard for corrugated metal roofing installation with exposed fasteners is 3:12. This means for every 12 inches of horizontal distance, the roof rises 3 inches. If your roof is flatter than this, water can “pond” or back up under the laps. For low-slope roofing, we typically recommend different profiles or specialized standing seam systems.
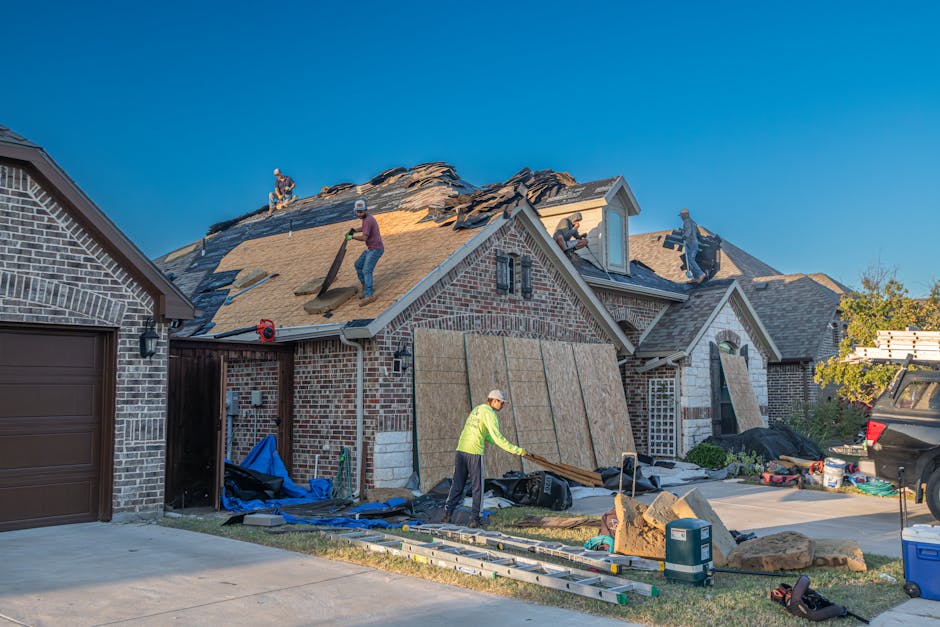
Can corrugated metal be installed over existing shingles?
While it is technically possible in some areas, we almost always recommend a full tear-off. Installing over shingles can trap moisture between the old and new roof, leading to “hidden” rot in your decking. It also makes it impossible for us to inspect the wood for structural integrity. A clean roof replacement is always the safer, longer-lasting choice.
How do you maintain a corrugated metal roof?
Metal is low-maintenance, not no-maintenance. We suggest:
- Annual Inspections: Check for loose fasteners or backed-out screws.
- Clear Debris: Don’t let wet leaves sit in your valleys or gutters; the trapped moisture can eventually eat through the coating.
- Tighten Fasteners: Over time, thermal expansion can slightly loosen screws. A quick “tune-up” every few years can prevent leaks.
- Tree Trimming: Keep branches at least 5-10 feet away from the roof to prevent scratching the protective paint.
If you aren’t comfortable on a ladder, our roof inspection services can handle this for you safely.
Conclusion
A corrugated metal roofing installation is a fantastic investment for any Florida property owner, offering a blend of classic style and unbeatable durability. However, the longevity of that investment depends entirely on the precision of the installation—from the first chalk line to the final ridge screw.
At Thunder Bay Roofing, we don’t just “put on roofs.” We build weather-tight systems designed to withstand the unique challenges of the Florida sun and storm seasons. We are proud to be a licensed and insured local partner for homeowners in Wesley Chapel, Lutz, and Land O’ Lakes.
Ready to upgrade your home with a roof that will last a lifetime? Let us show you why we are the leaders in expert metal roofing solutions across West Central Florida.